This post is sponsored
I’d been staring at our living room for two years thinking something has to change. The sofa was fine. The rug was fine. Everything was just fine, which is its own kind of problem. Every interior designer quote I got started at $500 for a single consultation, and most suggested budgets that assumed I didn’t have two kids destroying things on a weekly basis.
So I figured it out myself. Not all at once – over about three weekends, with a running total I kept in my phone’s notes app so I wouldn’t lose track. The final number was $287. The room looks like we actually thought about it, which we hadn’t, for years.
This guide is what I wish someone had handed me before I started. It’s not about buying everything new. It’s about figuring out what’s actually wrong, fixing the things that matter most, and not spending money on the things that don’t.
Step 1 – Figure Out What’s Actually Bothering You
Before you move anything or spend anything, spend twenty minutes sitting in your living room and writing down what bothers you. Not what you wish you had – what specifically feels off about what’s already there.
The most common culprits, in my experience talking to other moms who’ve done this:
Layout problems are the most frequently misdiagnosed. People think they need new furniture when the furniture they have is just arranged wrong. Sofas pushed against walls, coffee tables too far from the sofa, chairs angled toward nothing. A layout where people actually face each other and the main seating is within easy reach of a surface – that’s the baseline, and a lot of rooms don’t have it.
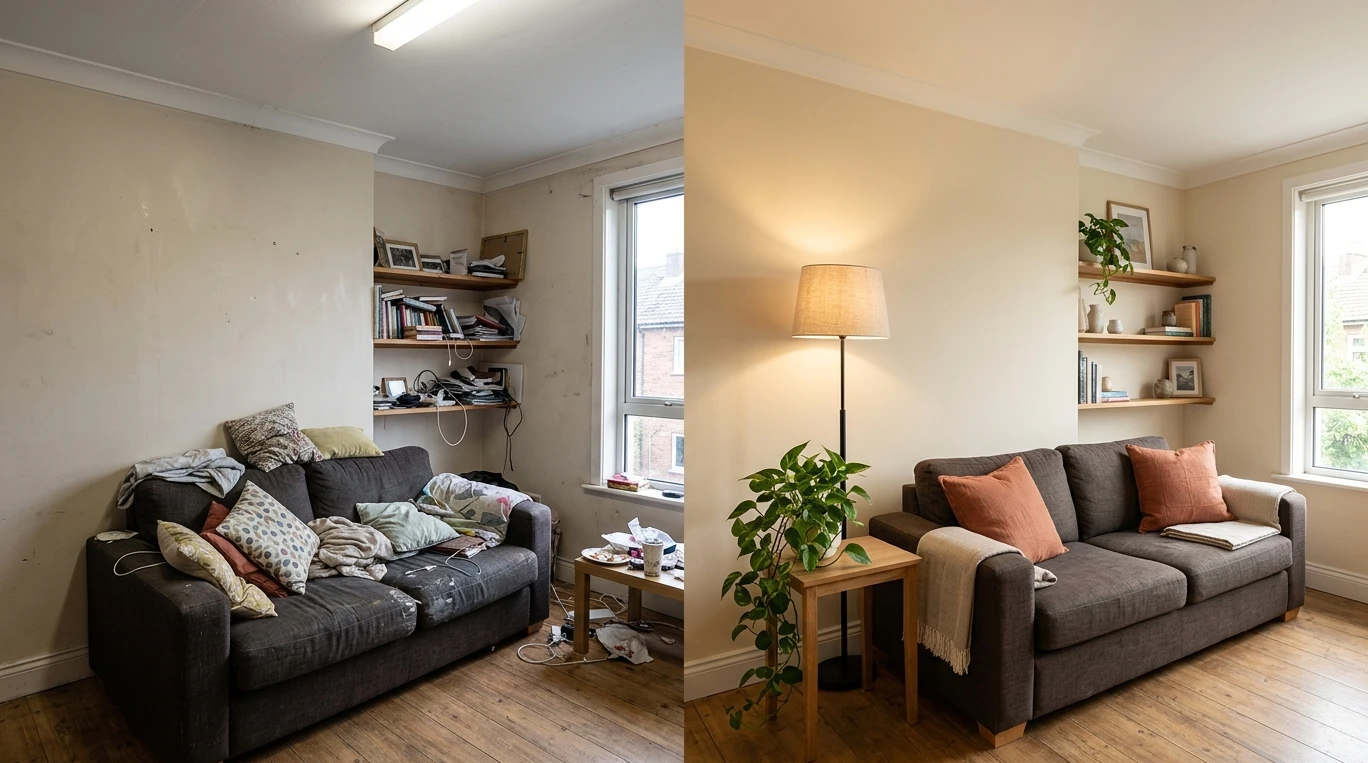
Lighting is the second most common issue. A single overhead fixture in the center of the room creates flat, unflattering light that makes everything look worse than it is. Adding one floor lamp and one table lamp, on opposite sides of the room, costs $60-$120 and changes the entire atmosphere after dark.
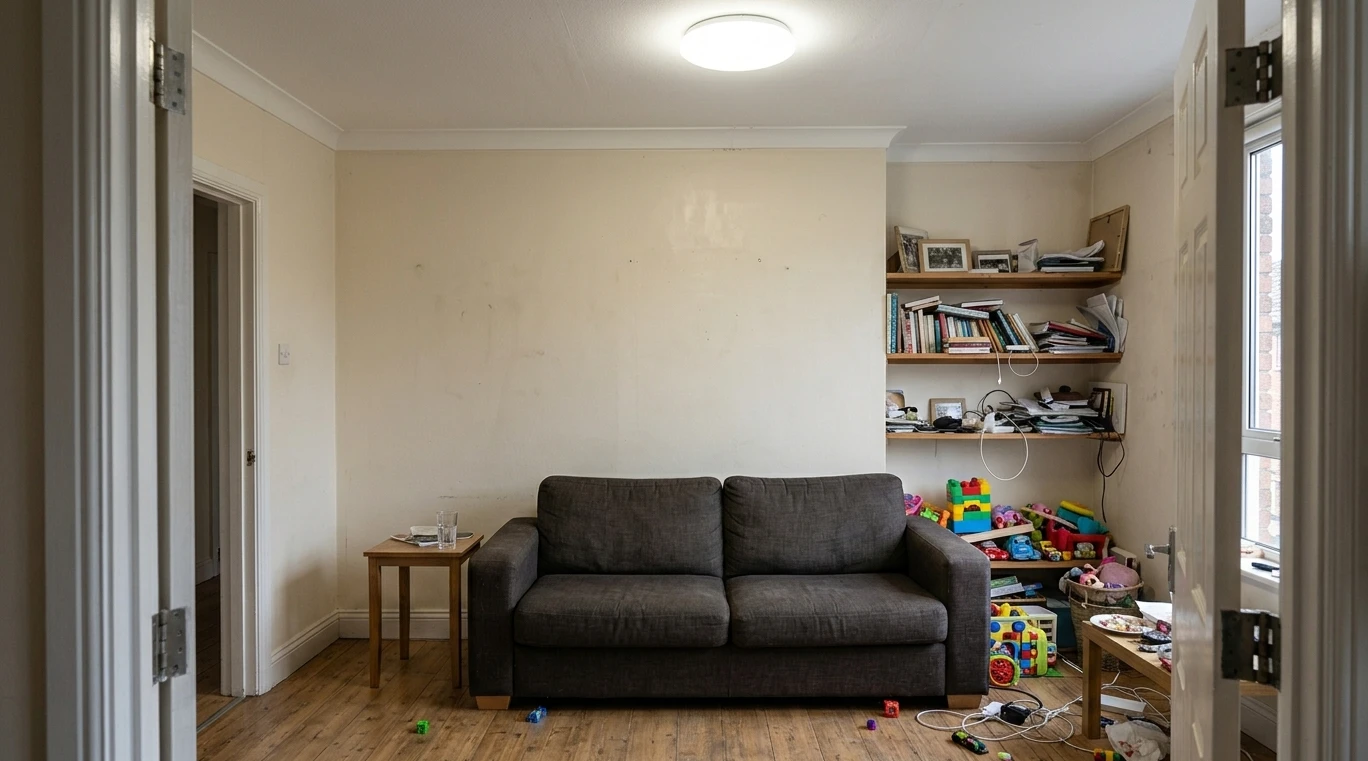
Too much stuff is third. Most living rooms have accumulated objects that aren’t decorative – they’re just there. Cables, remote controls, kids’ things that migrated from other rooms, picture frames that were hung when you moved in and never questioned since. Getting rid of or relocating about 30% of what’s currently on display usually makes the room feel larger without spending anything.
Write down which of these applies before you move to step two. The fix depends entirely on the diagnosis.
Step 2 – Set a Real Budget With These Buckets
Vague budgets don’t work. “I want to spend around $300” is a number without a plan. What actually helps is dividing the total into categories before you shop.
Here’s how I’d break down a $300 budget:
- Paint: $50-$80 for one or two walls (one gallon covers roughly 400 sq ft)
- Textiles (cushions, throw, curtains if needed): $60-$100
- One accent piece – a lamp, a small side table, a mirror: $80-$120
- Plants or small decor: $20-$40
- Buffer for things you didn’t anticipate: $20-$30
The categories matter because they force you to make tradeoffs before you’re standing in HomeGoods losing track of the total. If you find a lamp you love for $140, you know immediately that something else in the plan has to shrink.
Paint is almost always the highest-leverage item in this list. A single accent wall – or repainting the trim in a contrasting color – changes the character of a room more than any furniture purchase at the same price point.
Step 3 – Choose a Color Palette Without Expensive Mistakes
The 60-30-10 rule is the simplest framework that actually works: 60% dominant color (walls, large furniture), 30% secondary color (curtains, rug, secondary seating), 10% accent (cushions, artwork, small objects).
The mistake most people make is reversing the proportions – buying a bold sofa as the dominant color, then struggling to make everything else work around it. Bold colors belong in the 10% category. The dominant color should be something you can live with without thinking about it.
Before buying paint, test it properly. A 22 inch chip from the hardware store tells you almost nothing. A $5 sample pot painted in at least a 1212 inch patch on the actual wall, viewed at different times of day – morning light, afternoon, evening lamp – tells you what you need to know. Colors shift significantly between a chip and a wall, and between natural and artificial light.
For a living room that needs to work for a family with kids, I’d stay away from very pale colors on anything that gets touched (cushions, lower walls) and very dark colors in rooms with limited natural light. Both are harder to live with than they look in inspiration photos.
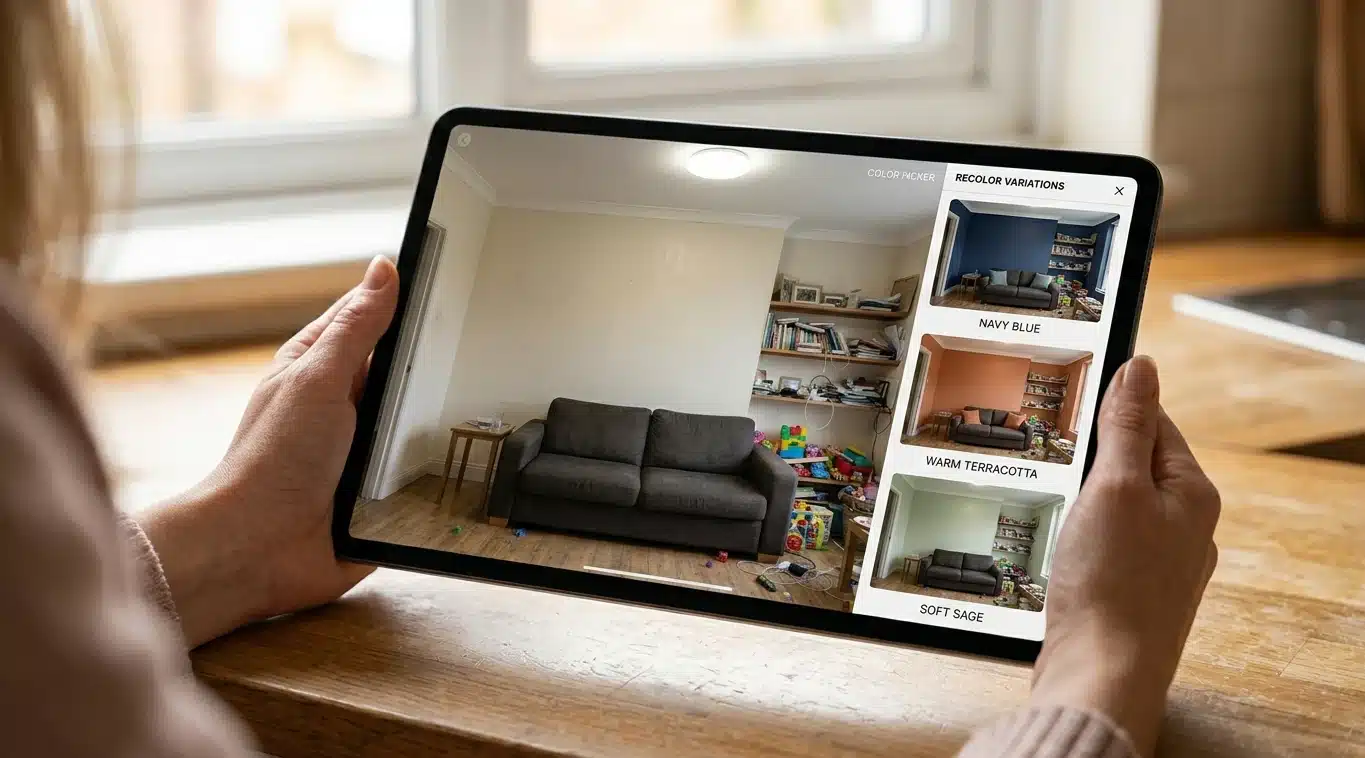
Step 4 – See It Before You Buy Anything

This is the step I didn’t know existed until about halfway through my second living room project, and it would have saved me one regrettable curtain purchase and one lamp that looked completely different in person.
Before spending anything on furniture or larger pieces, upload a photo of your actual room to a free AI living room design tool and run through a few different directions. You’re not committing to anything – you’re testing whether the navy accent wall actually works with your existing sofa, or whether the warmer beige you’d dismissed is actually better.
It takes about ten minutes. The output isn’t an exact product list, but it’s enough to confirm or reject a direction before you drive to the store. In my case, I ran three color combinations I’d been debating and eliminated two of them immediately. The one I thought I wanted (a deep green) looked much heavier in the room than I’d imagined. I went with a warmer neutral instead and haven’t second-guessed it.
If you want to test layout changes as well as color – moving the sofa, adding a chair, seeing how the room reads with an area rug versus without – an AI room design generator handles that too. Especially useful if you’re considering rearranging before buying anything new, which I’d always recommend as the first move anyway.
Step 5 – Small Changes That Make the Biggest Difference
Once you have a direction and a budget split, here’s the order I’d make changes in:
Declutter first, buy nothing. Remove everything from shelves and surfaces. Put back only what you actively like. This is free and often makes more difference than anything else on this list. In our case, I pulled twelve things off the shelves and put them in a box in the basement. The room immediately had more breathing room.
Rearrange the furniture before buying new pieces. Pull the sofa away from the wall by 6-8 inches. Angle the chairs slightly toward the center rather than parallel to the walls. Move the coffee table closer to the sofa – most people have it too far away to comfortably set a cup down. None of this costs anything and often resolves the “something feels off” problem entirely.
Change the textiles. New cushion covers (not cushions – just the covers) run $12-$25 each on Amazon or IKEA. A throw blanket adds texture for $20-$40. Curtains swapped from short to floor-length make ceilings feel higher. These are the lowest-cost, highest-visual-impact changes in the list.
Add a lamp. One floor lamp in a corner that’s currently dark is the single most underrated living room move. It adds warmth after dark, makes the room feel larger by lighting corners that overhead fixtures miss, and costs $40-$80 for something that looks decent.
Paint last – only after everything else is in place. It’s the most permanent change and the hardest to reverse, so it should come after you’ve already confirmed the direction through everything else.
One thing I’ll say honestly: replacing the cushion covers on our sofa changed about 80% of the room’s overall feel. The sofa itself is six years old. No one who visits now thinks it’s anything other than deliberate.
FAQ
What’s the best free AI tool for living room design?
Paintit.ai has a free living room design tool where you upload a photo of your actual room and get redesigned versions back. It’s useful specifically for testing color and layout directions before buying anything. It’s not a shopping tool – it won’t give you a product list – but for deciding between directions before you spend, it works well.
Can I actually redesign my living room for under $300?
Yes, with the right order of operations. Declutter and rearrange first (free). Then textiles ($60-$100). Then one accent piece ($80-$120). Then paint ($50-$80). If you skip furniture purchases entirely and focus on those four categories, $300 is realistic and the results are usually more cohesive than buying a new statement piece you haven’t planned around.
How do I choose a paint color without making a mistake?
Buy a sample pot ($4-$5), paint a 1212 inch or larger patch directly on the wall, and look at it at three different times of day. Chips from the hardware store are genuinely unreliable. The wall patch is the only test that tells you what you need to know.
Should I rearrange first or buy new things first?
Rearrange first, always. A surprising number of “this room needs new furniture” problems are actually layout problems. Once the furniture is in a better arrangement, you may find the room works well enough that you need to buy far less than you thought.
What if my living room has no natural light?
Prioritize lamps over paint. Dark rooms made darker by strong wall colors is one of the most common mistakes in low-light spaces. Keep walls in the light-to-mid neutral range and invest the money you’d have spent on paint into two or three well-placed lamps instead.